


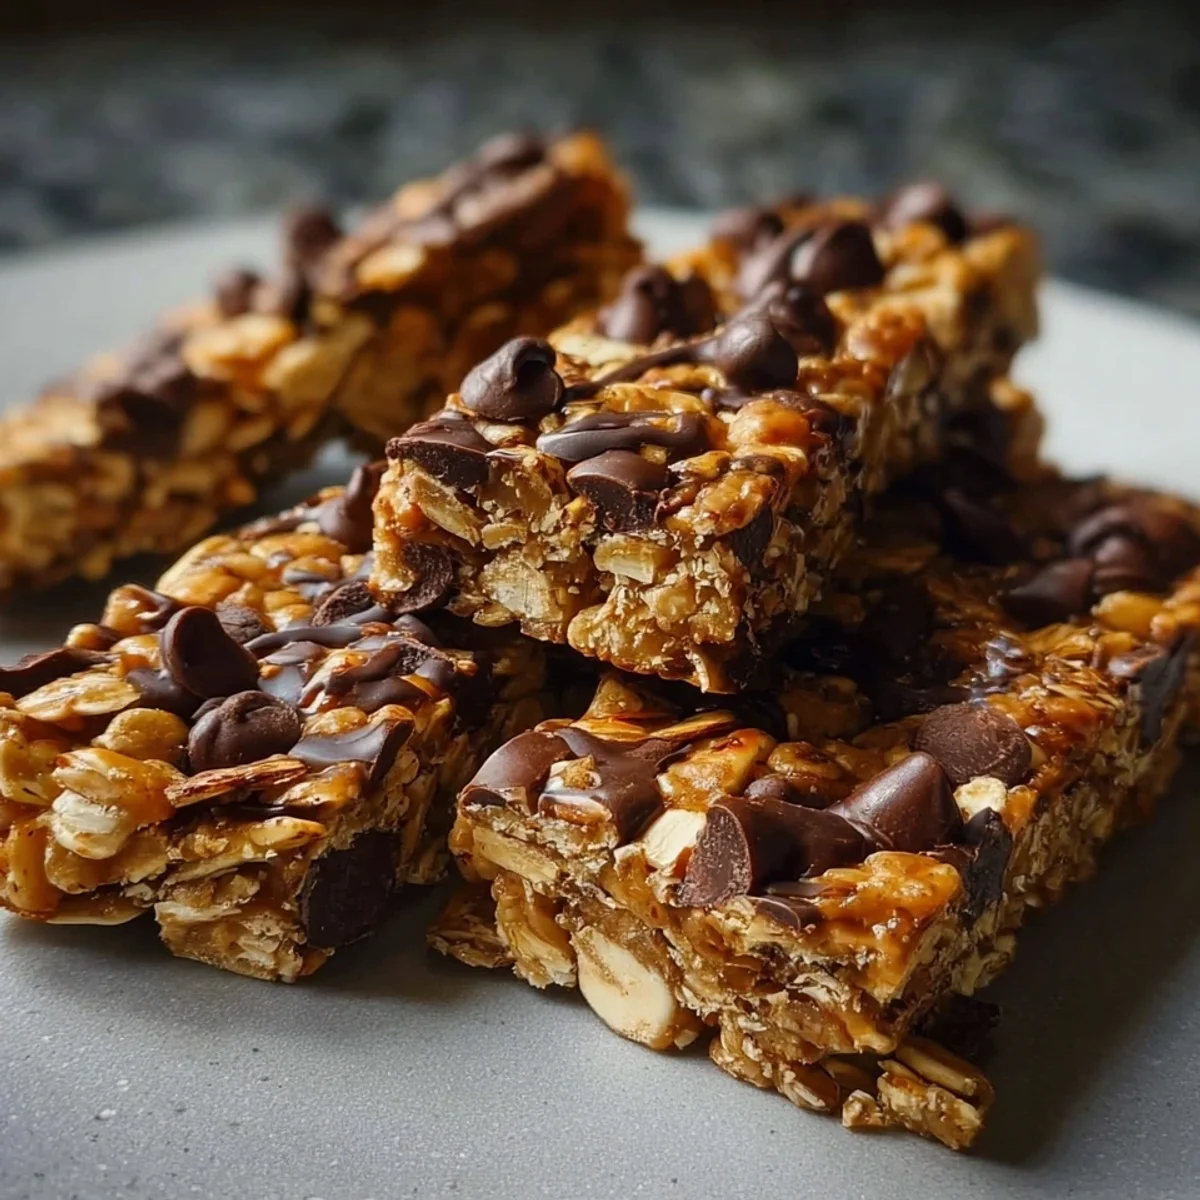
Healthy Homemade Protein Bars packed with nutrients. Fuel your day with these delicious, easy-to-make, no-bake bars. Perfect for a quick snack or post-workout boost.
Honestly, I used to spend a fortune on store-bought protein bars. You know, the ones with ingredient lists longer than my grocery receipt? I was always searching for that perfect grab-and-go snack that actually felt good for me. One afternoon, after a particularly disappointing, chalky bar experience, I thought, "There has to be a better way!" That's when I dove headfirst into creating these incredible Homemade protein Bars. And let me tell you, it changed my snack game forever!
Oh, the first time I made these, I got a little too excited with the food processor. I was trying to get the dates super smooth, and next thing I knew, the whole mixture was practically cement! I swear, my poor food processor was groaning. It was a sticky, messy disaster trying to scrape it out. Lesson learned: sometimes, a little texture is a good thing, and don't overwork the dates, hon!
Ingredients for Your Next Batch of Healthy Protein Bars
- 1 cup vanilla or unflavored whey protein powder: This is your muscle-building superstar! I've tried a few different brands, and honestly, the quality makes a huge difference here. If you use vanilla, you might need less vanilla extract later. It gives these bars their satisfying heft and keeps you full. Make sure it's a powder you actually like the taste of on its own, because you'll definitely taste it! It's the core of what makes these bars so effective.
- 1 cup natural unsweetened peanut butter: This is the glue, the flavor bomb, the creamy dream! I always go for natural, unsweetened stuff because it has no weird oils or sugars. Stir it well before measuring, especially if it's separated. It binds everything together, giving these bars that perfect chewy texture we all crave. You could use almond butter too, but peanut butter just hits different, ya know?
- 1 cup pitted Medjool dates, packed: Dates are nature's candy and the secret weapon for sweetness and chewiness. Medjool dates are the best here super soft and caramel-like. Make sure they're pitted, or you'll have a crunchy surprise (oops!). They help bind the bars without needing a ton of added sugar and add a lovely depth of flavor. Don't skip these, they're essential for the texture of these Homemade Protein Bars!
- 1 1/2 cups rolled oats (gluten-free if desired): Oats are the backbone! They add fiber, bulk, and that satisfying chew. I use old-fashioned rolled oats, not quick oats, because they hold up better and give a nicer texture. If you're gluten-free, grab certified GF oats easy peasy. They soak up all the delicious wet ingredients and make these bars truly substantial.
- 2 tbsp chia seeds: Tiny but mighty! Chia seeds are little powerhouses, packed with omega-3s and fiber. They also help absorb moisture and act as a binder, giving these bars an even better consistency. Don't worry, you won't even taste them, but they're working hard behind the scenes to make these bars extra nutritious.
- 1/2 cup raw unsalted almonds, roughly chopped: For that glorious crunch! I love adding chopped almonds for texture contrast and a little extra healthy fat. Raw and unsalted is key so you control the flavor. You can swap them for walnuts or pecans, but almonds are my go-to for that perfect bite. They just elevate the whole experience, making each of your Homemade Protein Bars interesting.
Whipping Up Your Own Homemade Protein Bars: Step-by-Step
- Step 1: Process Wet Ingredients:
- First up, grab your trusty food processor! Toss in those soft Medjool dates, natural peanut butter, pure maple syrup, and vanilla extract. Pulse it all together until it forms a thick, sticky paste. You want it smooth, but don't overdo it like I sometimes do (oops!). It should smell amazing, sweet and nutty. This gooey base is what holds our incredible Homemade Protein Bars together, so take your time and get it right!
- Step 2: Combine Dry Mix:
- While your processor is doing its thing, grab a large mixing bowl. Add your rolled oats, protein powder, chia seeds, and ground flaxseed meal. Give it a good whisk with a fork or a spoon to make sure everything is evenly distributed. You don't want a clump of protein powder in one bar, trust me! This dry blend is going to add texture and all that good-for-you fiber to our delicious snack.
- Step 3: Mix All Together:
- Now for the fun part! Scrape that sticky wet mixture from the food processor into your bowl with the dry ingredients. Get in there with your hands (or a sturdy spatula, but hands are more fun!). Really work it until everything is evenly combined. It'll be thick and a little crumbly at first, but keep kneading. You want all those dry bits coated in the date-peanut butter goodness. This is where the magic happens for these Homemade Protein Bars!
- Step 4: Press Into Pan:
- Grab an 8x8 inch square baking pan and line it with parchment paper, leaving an overhang on the sides total lifesaver for easy removal! Dump your mixture into the pan. Now, press it down firmly and evenly. I use the bottom of a flat glass or my knuckles to really compact it. The harder you press, the less likely your Homemade Protein Bars will crumble later. Get those edges nice and neat!
- Step 5: Chill and Set:
- This step is crucial, hon! Once your mixture is pressed perfectly into the pan, pop it into the fridge. Let it chill for at least 2 hours, or even better, overnight. This gives everything time to firm up and for the flavors to meld beautifully. Trying to cut them too soon is a recipe for crumbly disaster, and nobody wants that! Patience is a virtue here, my friend.
- Step 6: Cut and Store:
- After chilling, use the parchment paper overhang to lift the whole slab out of the pan. Place it on a cutting board. Now, for the moment of truth! Use a sharp knife to cut them into 12 even bars. I usually cut it in half, then each half into thirds, then each of those into two. You'll have beautiful, ready-to-eat bars for your healthy snacking!
There's something incredibly satisfying about making your own snacks. The aroma of peanut butter and dates filling the kitchen, the tactile pleasure of mixing it all by hand, and then seeing those perfectly formed bars emerge from the fridge. It's not just cooking, it's a little act of self-care, knowing exactly what’s fueling your body. It just feels good, you know?
Keeping Your Protein Bars Fresh and Tasty
Okay, so you've got a beautiful batch of these bars, now how to keep them perfect? My go-to is an airtight container in the fridge. They’ll stay fresh and fantastic for up to two weeks. I once left a batch on the counter during a heatwave (oops!), and let's just say they turned into a very sad, melty puddle. Not my finest moment! You can also wrap individual bars in parchment paper or plastic wrap for super easy grab-and-go. For longer storage, freeze them! They thaw beautifully in about 20-30 minutes at room temperature, making them ideal for meal prep. Just make sure they're in a freezer-safe bag or container to prevent freezer burn. Trust me, you don't want to waste a single one of these gems!

Playing Around with Ingredients for Homemade Protein Bars
I've played around with so many variations of these bars, it's half the fun! For the protein powder, you can totally use a plant-based option like pea or soy protein, but sometimes it changes the texture a bit, making them a little drier. You might need an extra tablespoon of maple syrup or water to compensate. Not a peanut butter fan? Almond butter, cashew butter, or even sunflower seed butter work great just ensure they're natural and unsweetened. Instead of almonds, try chopped walnuts, pecans, or even pumpkin seeds for a different crunch. Don't have chia seeds? Ground flaxseed can stand in for both, just make sure you still hit that 4 tbsp total. Feel free to swap shredded coconut for cacao nibs or mini chocolate chips for an extra treat! The possibilities are endless, so experiment!
Enjoying Your Delicious Protein Bars
These bars are so versatile, you'll find yourself reaching for them all the time! I love one as a quick breakfast with my morning coffee, especially on those hectic weekdays. They’re fantastic pre- or post-workout fuel, giving you sustained energy without feeling heavy. My kids even love them as an after-school snack, which is a win in my book since they're so much better than sugary processed stuff. Pair one with a glass of unsweetened almond milk for a satisfying afternoon pick-me-up, or even crumble a piece over some Greek yogurt with fresh berries for a little dessert-like treat. Honestly, they’re good anytime, anywhere. Keep them handy, you won't regret it!
The Journey of Protein Bars: A Little History
The idea of a 'protein bar' isn't new, but its evolution is pretty fascinating! Initially, they were mostly for serious bodybuilders, often tasting pretty... utilitarian. Think dense, chalky, and not exactly a joy to eat! But as fitness and wellness became more mainstream, people started craving healthier, tastier options for convenience. The home cooking movement then took over, with folks like us wanting to ditch the processed stuff and make our own. These Homemade Protein Bars are a direct descendant of that desire for wholesome, customizable, and delicious fuel. It's about taking control of what we put into our bodies, making nutrition accessible and enjoyable, right from our own kitchens. It's a modern twist on an old need!
There you have it, my friend! Your ticket to delicious, healthy, and super satisfying snacks. Making these at home has been a game-changer for me, and I know you'll love them too. Seriously, once you go homemade, you never go back! Give them a try, and please, come back and tell me all about your own creations and how you loved them in the comments below. Happy snacking!

FAQs About Making Homemade Protein Bars at Home
- → Can I use a different type of protein powder?
Yes, totally! I've used plant-based protein, and it works, but sometimes it makes the bars a bit drier. You might need to add an extra splash of water or maple syrup to get the right consistency. Just experiment a little!
- → How long do these bars last?
In an airtight container in the fridge, they're good for up to two weeks. Honestly, mine rarely last that long because we eat them so fast! You can also freeze them for a couple of months, just thaw before enjoying.
- → My mixture is too crumbly, what went wrong?
This usually means it's not pressed enough or the wet ingredients weren't processed quite enough. Try adding another tablespoon of peanut butter or maple syrup, then really get in there and press, press, press!
- → Can I add chocolate chips?
Oh, yes! Mini chocolate chips or cacao nibs are a fantastic addition. I usually fold them in at Step 3 with the dry ingredients. Just remember, a little goes a long way if you're watching sugar content.
- → Are these suitable for meal prep?
They are the ultimate meal prep snack! Make a big batch on Sunday, cut them, and store them. You'll have healthy, homemade fuel ready to grab all week long. It saves so much time and keeps you on track.
Healthy Homemade Protein Bars: Easy No-Bake Recipe
Healthy Homemade Protein Bars packed with nutrients. Fuel your day with these delicious, easy-to-make, no-bake bars. Perfect for a quick snack or post-workout boost.
Ingredients
The Protein Powerhouse
- 1 cup vanilla or unflavored whey protein powder
- 1 cup natural unsweetened peanut butter
Sweetness & Bind
- 1 cup pitted Medjool dates, packed
- 1/4 cup pure maple syrup
- 1 tsp pure vanilla extract
Healthy Fats & Fiber Boost
- 1 1/2 cups rolled oats (gluten-free if desired)
- 2 tbsp chia seeds
- 2 tbsp ground flaxseed meal
- 1/2 cup raw unsalted almonds, roughly chopped
Flavor & Texture Enhancers
- 1/4 cup unsweetened shredded coconut
- 1/4 cup mini dark chocolate chips (70% cacao or higher)
- 1/2 tsp ground cinnamon
- 1/4 tsp sea salt
Instructions
-
1Process Wet IngredientsIn a food processor, combine 1 cup pitted Medjool dates, 1 cup natural unsweetened peanut butter, 1/4 cup pure maple syrup, and 1 tsp pure vanilla extract. Process until a thick, sticky paste forms. This forms the binding base for your Healthy Homemade Protein Bars Recipe.
-
2Combine Dry MixIn a large mixing bowl, whisk together 1 cup vanilla or unflavored whey protein powder, 1 1/2 cups rolled oats, 2 tbsp chia seeds, 2 tbsp ground flaxseed meal, 1/2 cup raw unsalted almonds, 1/4 cup unsweetened shredded coconut, 1/4 cup mini dark chocolate chips, 1/2 tsp ground cinnamon, and 1/4 tsp sea salt.
-
3Mix All TogetherAdd the date-peanut butter mixture from the food processor to the bowl with the dry ingredients. Use a sturdy spoon or your hands to thoroughly combine everything until a uniform, sticky dough forms. Ensure all ingredients are well incorporated for the best Healthy Homemade Protein Bars Recipe.
-
4Press Into PanLine a 9x13 inch baking pan with parchment paper, leaving an overhang on the sides. Transfer the protein bar mixture into the prepared pan. Press down very firmly and evenly across the entire surface using your hands or the back of a spatula to form your Healthy Homemade Protein Bars Recipe.
-
5Chill and SetCover the pan with plastic wrap and refrigerate for at least 2 hours, or until the mixture is completely firm. This chilling step is crucial for the bars to hold their shape and achieve the perfect texture for your Healthy Homemade Protein Bars Recipe.
-
6Cut and StoreOnce firm, lift the mixture out of the pan using the parchment paper overhang. Place it on a cutting board and cut into 12 equal bars. Store the bars in an airtight container in the refrigerator for up to 2 weeks.
Notes
Store these protein bars in an airtight container in the refrigerator for up to 2 weeks, or freeze for longer storage (up to 2 months).
Feel free to swap peanut butter for almond butter or cashew butter. You can also experiment with different nuts or seeds like walnuts or pumpkin seeds.
For an extra boost, add a scoop of collagen powder or a sprinkle of maca powder to the dry ingredients. Adjust sweetness by adding more maple syrup if desired.
These bars are perfect for a quick breakfast, a post-workout snack, or a healthy treat on the go. Enjoy with a glass of milk or a cup of coffee.
Equipment
Please check ingredients for potential allergens and consult a health professional if in doubt.
Nutrition Facts
It is important to consider this information as approximate and not to use it as definitive health advice.
Comments
Leave a Comment