


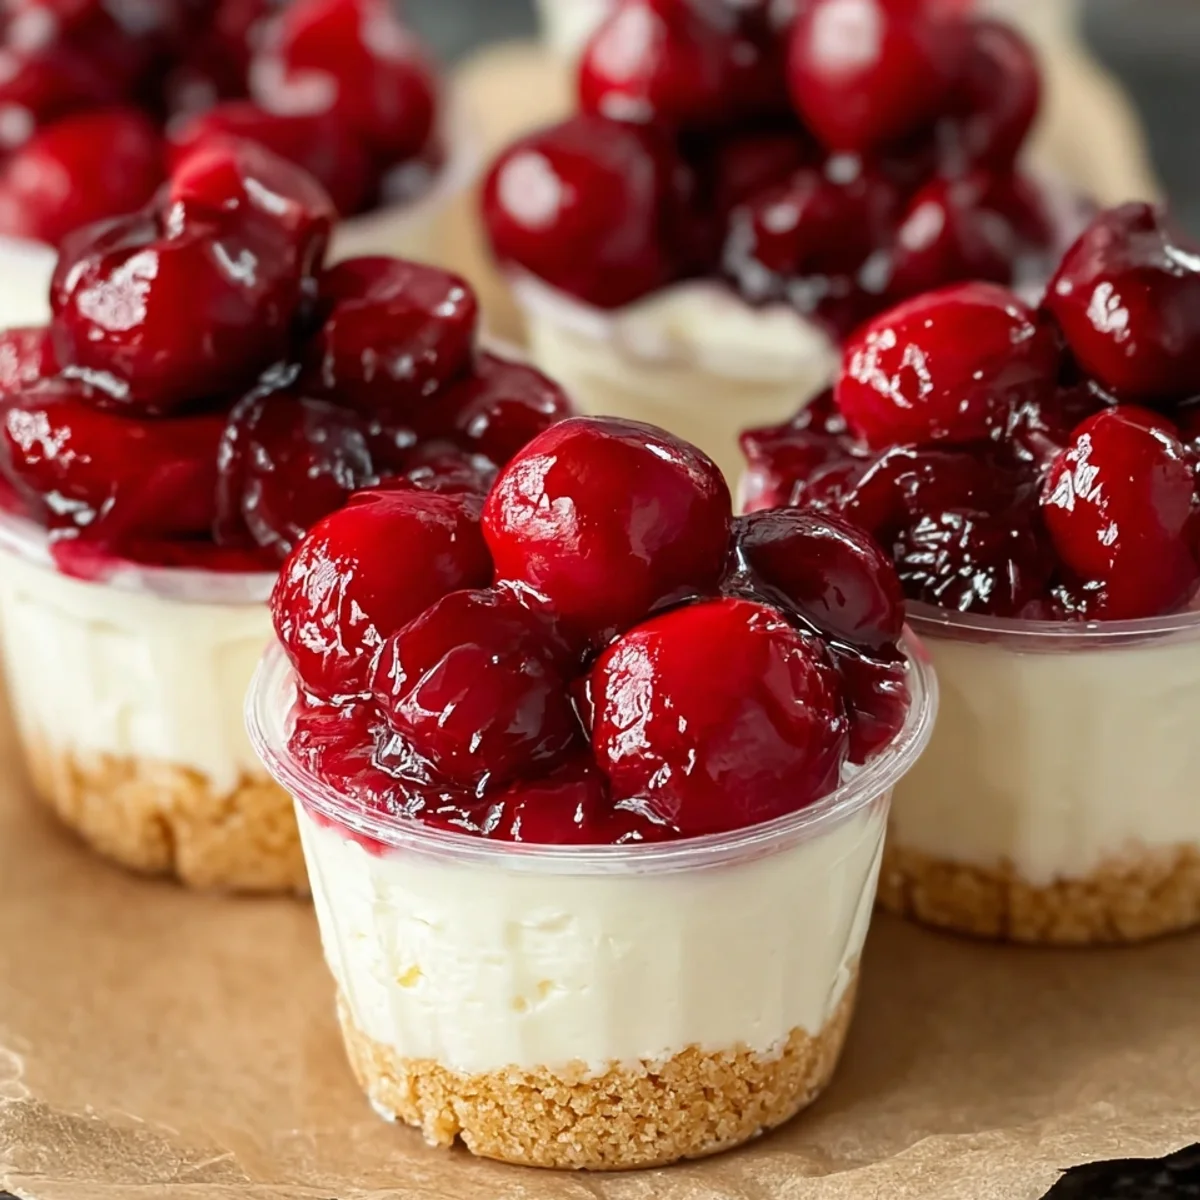
Enjoy simple Low Carb Cherry Cheesecake Cups. This easy no-bake dessert is perfect for a quick, healthy treat. Delicious and guilt-free.
Oh my gosh, you guys! I still remember the first time I tried to go low-carb. I missed desserts SO much. Cheesy, creamy, fruity goodness? Forget about it! Then, one sunny afternoon, after a particularly sad sugar craving, I decided enough was enough. I was going to crack the code for a no-bake treat. And that, my friends, is how these amazing Low carb Cherry Cheesecake cups were born. A game-changer, honestly!
One time, I was so excited to make these, I grabbed the wrong sweetener for the crust. Instead of erythritol, I used a savory spice blend! Oops! My first bite was… unexpected, to say the least. My husband still teases me about the 'herby' Low carb Cherry Cheesecake. Lesson learned: always double-check your labels, especially when you're multitasking!
Low Carb Cherry Cheesecake: The Star Ingredients
- 1 1/2 cups almond flour: This is our superstar for the crust! Forget those sugary graham crackers, almond flour gives us that perfect crumbly texture without all the carbs. I've tried other nut flours, but almond just has this delicate flavor that really lets the cherry and cream cheese shine. Plus, it binds so well with the butter. It’s the foundation for our amazing Low Carb Cherry Cheesecake cups, so don't skimp on quality here!
- 16 oz full-fat cream cheese, softened: Alright, this is the heart and soul of any cheesecake, right? And for our Low Carb Cherry Cheesecake, full-fat is non-negotiable. It gives you that luxurious, tangy, rich creaminess we all crave. Make sure it's super soft before you start mixing, or you'll end up with lumps, and nobody wants lumpy cheesecake. I usually leave mine out on the counter for at least an hour, sometimes two if my kitchen is chilly.
- 1 cup heavy cream: This is where the 'fluffy cloud' magic happens! Whipping heavy cream into soft peaks and then folding it into the cream cheese mixture makes the filling so light and airy, not dense. It balances the richness of the cream cheese perfectly. Trust me, it elevates the texture from 'good' to 'oh-my-gosh-I-can't-stop-eating-this'. It's essential for that melt-in-your-mouth experience.
- 2 tbsp erythritol or monk fruit sweetener blend (crust): For the crust, this sweetener is key to getting that classic graham cracker sweetness without the sugar. I’ve found 2 tablespoons is just the right amount to complement the almond flour without being overpowering. It dissolves beautifully with the melted butter, creating a cohesive, slightly sweet base that's just begging for that creamy filling. Don't skip it, it makes all the difference!
- 1/2 cup erythritol or monk fruit sweetener blend (filling): Now for the filling's sweetness! This amount gives you that perfect balance of sweet and tangy. I've experimented, and too little leaves it a bit bland, too much can sometimes give that 'cooling' effect some sugar alcohols have. This half-cup hits the sweet spot, making the filling sing. It's what makes the Low Carb Cherry Cheesecake filling truly irresistible.
- 1 tbsp fresh lemon juice: Ah, the secret weapon! A little splash of fresh lemon juice brightens everything up. It cuts through the richness of the cream cheese and heavy cream, adding a subtle tang that makes your taste buds perk up. It's not enough to make it taste lemony, just enough to add that classic cheesecake 'zing'. Honestly, don't use bottled lemon juice here, fresh makes all the difference, I promise!
Making Your Low Carb Cherry Cheesecake Cups
- Step 1: Prepare Crumb Base:
- First things first, let's get that glorious crust going! You'll want to grab your almond flour, melted butter, sweetener, vanilla, and a pinch of salt. Mix them all up in a bowl until it looks like wet sand. This is the foundation of our no-bake Low Carb Cherry Cheesecake, so make sure it's well combined. I love the smell of the almond flour and vanilla mingling, it's so comforting and promises deliciousness to come. Just a few stirs and you're ready for the next step, easy peasy!
- Step 2: Press Crusts:
- Now, for the fun part: pressing those crusts! Line your muffin tin with liners this is crucial for easy removal later, trust me. Spoon about 1-2 tablespoons of your crumb mixture into each liner. Then, grab a small glass or the back of a spoon and firmly press it down. You want it nice and compact so it doesn't crumble when you bite into your amazing Low Carb Cherry Cheesecake cup. Pop these babies in the fridge to chill while you make the filling. That little chill time is a game-changer for stability!
- Step 3: Make Cheesecake Filling:
- Time for the star of the show! Get your softened cream cheese, heavy cream, sweetener, vanilla, and lemon juice ready. In a large bowl, beat the cream cheese until it's super smooth and fluffy no lumps allowed! Then, gradually add the sweetener, vanilla, and lemon juice, beating until just combined. In a separate bowl, whip your heavy cream until you get beautiful, stiff peaks. Gently fold that whipped cream into your cream cheese mixture. This creates that heavenly, airy texture for our Low Carb Cherry Cheesecake filling. So luscious!
- Step 4: Fill Cheesecake Cups:
- Okay, crusts are chilling, filling is perfect. Now, let's bring them together! Grab those chilled crusts from the fridge. Spoon or pipe your creamy cheesecake filling into each cup, filling them almost to the top. I like to use an ice cream scoop for this, it keeps things tidy and gives even portions. Smooth out the tops with the back of a spoon or an offset spatula. These are starting to look like proper Low Carb Cherry Cheesecake cups now, aren't they? So satisfying to see them take shape!
- Step 5: Cook Cherry Topping:
- Now for that gorgeous, vibrant cherry topping! In a small saucepan, combine your frozen cherries, a splash of water, and a bit of sweetener. Simmer it gently until the cherries start to break down and release their juices. The kitchen will smell amazing, honestly! This is where the magic happens for our Low Carb Cherry Cheesecake's crowning glory. I love watching the color deepen, it just screams 'deliciousness is coming!'
- Step 6: Assemble & Chill:
- Once your cherry topping has cooled and thickened a bit, it's time for the grand finale! Spoon a generous dollop of that ruby-red cherry goodness over each filled cheesecake cup. Oh, the contrast of the white filling and the bright red topping is just stunning! Now, and this is the hardest part, pop them back into the fridge for at least 4 hours, or even better, overnight. That chill time is crucial for everything to set beautifully, making your Low Carb Cherry Cheesecake cups firm and perfectly sliceable (or scoopable!).
Making these Low Carb Cherry Cheesecake cups always feels like a little victory. It's such a simple process, but the payoff is huge. The aroma of vanilla and almond, then the sweet tartness of the cherries simmering my kitchen just smells like happiness. It's a dessert that brings joy, both in the making and, of course, in the eating!
Keeping Your Low Carb Cherry Cheesecake Fresh
So, you've made these beauties and you have leftovers (if you're lucky!). My advice? Store them in an airtight container in the fridge. They'll keep wonderfully for about 3-4 days. I've tried freezing them before, and while they're still edible, the texture can get a little icy and the crust a bit crumbly after thawing. Honestly, they're best fresh from the fridge. I once left a batch uncovered, and they picked up a weird fridge smell ew! Always cover them tightly to keep them tasting perfect.

Swapping Ingredients for Your Low Carb Cherry Cheesecake
I've played around with so many variations! If you're not a fan of almond flour, you can try pecan flour for the crust, though it's a bit richer. For the sweetener, erythritol or monk fruit blend works best, but allulose is another great option if you have it. If cherries aren't your jam, try a mixed berry topping raspberries or blueberries are fantastic! Just remember to adjust sweetener to taste, as different fruits have different levels of tartness. I once used sugar-free jam for the topping in a pinch, and it was okay, but fresh is always better.
Serving Up Your Delicious Low Carb Cherry Cheesecake
These Low Carb Cherry Cheesecake cups are absolutely perfect on their own, a little jewel of a dessert. But if you want to get fancy, a tiny dollop of extra whipped cream on top never hurt anyone! A sprig of fresh mint adds a lovely pop of color and freshness. They're wonderful for a backyard BBQ, a light dinner party dessert, or just a treat after a long day. I sometimes serve them with a hot cup of black coffee or a chilled unsweetened iced tea. So elegant, yet so simple!
The Sweet History Behind Low Carb Cherry Cheesecake
Cheesecake itself has ancient roots, dating back to ancient Greece, where it was served to athletes! The modern, creamy, New York-style cheesecake we know and love evolved much later. This no-bake, low-carb version is a personal homage to that classic dessert, adapting it for modern dietary needs. It's my way of saying, 'Hey, you can still enjoy your favorites, just with a clever twist!' It blends that timeless comfort with a contemporary health-conscious approach, making it a delicious bridge between eras.
And there you have it, friends! These Low Carb Cherry Cheesecake cups are truly a dream come true for anyone craving a sweet, satisfying, yet healthy dessert. They're proof that you don't have to sacrifice flavor for your lifestyle goals. I hope you love them as much as I do! Give them a try, and tell me: what's your favorite part about this recipe? Share your thoughts in the comments below!

Your Questions About Low Carb Cherry Cheesecake, Answered!
- Can I use fresh cherries for the topping?
Absolutely! If cherries are in season, fresh is fantastic. Just pit them first, then follow the same cooking instructions. You might need a tiny bit more water to get them simmering, but the flavor will be out of this world. I've done it, and it's so worth the extra effort!
- How do I make sure my crust doesn't crumble?
The key is really pressing it down firmly into the muffin liner. Use the back of a spoon or a small glass. Also, don't skimp on the melted butter, it acts as the binder. Chilling it before adding the filling helps it set up nicely too. A solid base makes for a happy Low Carb Cherry Cheesecake experience!
- Can I make this dairy-free?
Hmm, that's a tricky one for cheesecake! You could experiment with dairy-free cream cheese alternatives and coconut cream (the thick part from a can of full-fat coconut milk, chilled) instead of heavy cream. I haven't personally perfected a dairy-free Low Carb Cherry Cheesecake yet, but it's on my to-do list!
- Why did my filling turn out dense?
Most likely, you overmixed it after folding in the whipped cream. Whipped cream adds air, making the filling light and fluffy. If you beat it too much after that point, you'll knock all that air out. Be gentle! Just fold until barely combined for that perfect, airy Low Carb Cherry Cheesecake texture.
- What if I don't have lemon juice?
While fresh lemon juice adds a wonderful zing that brightens the flavor, if you're really in a pinch, you can omit it. The cheesecake will still be delicious, just a tiny bit less vibrant. Don't substitute with vinegar or anything else, it won't be the same! Just leave it out if you have to.
Low Carb Cherry Cheesecake Cups - Easy No-Bake Dessert
Enjoy simple Low Carb Cherry Cheesecake Cups. This easy no-bake dessert is perfect for a quick, healthy treat. Delicious and guilt-free.
Ingredients
Crumbly Low-Carb Base
- 1 1/2 cups almond flour
- 1/4 cup unsalted butter, melted
- 2 tbsp erythritol or monk fruit sweetener blend
- 1/2 tsp vanilla extract
- Pinch of salt
Velvety Cheesecake Filling
- 16 oz full-fat cream cheese, softened
- 1 cup heavy cream
- 1/2 cup erythritol or monk fruit sweetener blend
- 1 tsp vanilla extract
- 1 tbsp fresh lemon juice
Ruby Red Cherry Topping
- 1 1/2 cups frozen pitted cherries (no sugar added)
- 2 tbsp erythritol or monk fruit sweetener blend
- 1/4 tsp xanthan gum
- 2 tbsp water
- 1/4 tsp almond extract (optional)
Instructions
-
1Prepare Crumb BaseCombine 1 1/2 cups almond flour, 1/4 cup melted unsalted butter, 2 tbsp erythritol or monk fruit sweetener blend, 1/2 tsp vanilla extract, and a pinch of salt in a medium bowl. Mix until well combined and crumbly. This forms the delicious foundation for your Low Carb Cherry Cheesecake Cups - Simple No-Bake Dessert.
-
2Press CrustsLine 8 muffin cups with paper liners. Divide the almond flour mixture evenly among the liners, pressing firmly into the bottom of each cup to form a compact crust. Place the muffin tin in the refrigerator to chill while you prepare the filling.
-
3Make Cheesecake FillingIn a large bowl, beat 16 oz softened full-fat cream cheese until smooth. Add 1 cup heavy cream, 1/2 cup erythritol or monk fruit sweetener blend, 1 tsp vanilla extract, and 1 tbsp fresh lemon juice. Beat on medium-high until light, fluffy, and well combined.
-
4Fill Cheesecake CupsSpoon the velvety cheesecake filling evenly over the chilled crusts in each muffin cup. Smooth the tops with a spoon or offset spatula. Ensure each cup is filled generously for the perfect Low Carb Cherry Cheesecake Cups - Simple No-Bake Dessert experience.
-
5Cook Cherry ToppingIn a small saucepan, combine 1 1/2 cups frozen pitted cherries (no sugar added), 2 tbsp erythritol or monk fruit sweetener blend, and 2 tbsp water. Bring to a simmer over medium heat, stirring occasionally. Cook for 5-7 minutes until cherries soften and release their juices.
-
6Thicken & Cool ToppingIn a small bowl, whisk 1/4 tsp xanthan gum with 1 tbsp of the hot cherry liquid until smooth, then stir back into the saucepan. Cook for 1-2 minutes until thickened. Remove from heat, stir in 1/4 tsp almond extract (optional), and let cool completely.
-
7Assemble & ChillOnce the cherry topping is completely cool, spoon it generously over the cheesecake filling in each cup. Refrigerate the Low Carb Cherry Cheesecake Cups - Simple No-Bake Dessert for at least 4 hours, or preferably overnight, to set completely.
Notes
Store leftover cheesecake cups in an airtight container in the refrigerator for up to 4-5 days.
Feel free to adjust the amount of erythritol or monk fruit sweetener blend in any component to suit your personal taste preference.
For a nut-free crust option, you could try a coconut flour base, but be aware it absorbs much more liquid and will require butter/liquid adjustments.
For an extra touch, garnish with a fresh mint leaf or a few slivered almonds just before serving.
Equipment
Please check ingredients for potential allergens and consult a health professional if in doubt.
Nutrition Facts
It is important to consider this information as approximate and not to use it as definitive health advice.
Comments
Leave a Comment