



Learn to make authentic Korean fermented cabbage kimchi. This beginner-friendly recipe guides you through simple steps for delicious, probiotic-rich homemade kimchi.
Okay, friends, let's talk kimchi! For years, I was intimidated by the idea of making my own Korean Cabbage Kimchi. It felt like this ancient, complicated art. Then, during a particularly cold winter, I craved that spicy, tangy crunch, and decided, "What's the worst that could happen?" Turns out, it's not scary at all! This recipe is my go-to, perfected through a few happy accidents, and it's surprisingly beginner-friendly. Get ready to fall in love!
Oh man, my first time making Korean Cabbage Kimchi, I got a little too enthusiastic with the gochugaru. I thought, "More chili, more flavor, right?!" Wrong. My hands were practically glowing red for hours, and the first taste test made my eyes water like a leaky faucet. My partner took one bite and just said, "Whoa, that's... ambitious." We still laugh about "The Fire Kimchi Incident." Live and learn!
Ingredients for Your First Batch of Delicious Kimchi
- 2 1/2 lbs Napa cabbage, cut into 2-inch pieces: This is your canvas, hon! Napa cabbage is perfect for Korean Cabbage Kimchi because its leaves are sturdy enough to stand up to brining but tender enough to absorb all those amazing flavors. You want those 2-inch pieces so every bite is a perfect crunch, not too big, not too small. It's the star of the show, obviously!
- 1/2 cup coarse sea salt (for brining): Don't skimp on this step, seriously. The salt isn't just for flavor, it draws out water from the cabbage, making it pliable and ready to soak up the paste. I once used regular table salt, thinking "salt is salt," and oops, it just didn't work the same. Coarse sea salt gives you that perfect texture and isn't overly salty in the end.
- 8 cups filtered water (for brining): Clean, filtered water is key for your brine. You want a pure environment for your cabbage to soften and prepare for fermentation. Tap water can sometimes have chlorine or other stuff that might mess with the good bacteria we're trying to cultivate. Think of it as giving your cabbage a spa day!
- 1/2 cup gochugaru (Korean chili flakes): Ah, the heart and soul of the spice! Gochugaru isn't just hot, it has this incredible smoky, sweet complexity that's essential for authentic kimchi. Don't substitute with regular chili flakes, it just won't be the same. The color it gives is gorgeous too, a vibrant red that just screams "eat me!"
- 8 cloves garlic, minced (about 2 tbsp): Garlic, glorious garlic! This isn't just a background player, it's a major flavor contributor. You want it fresh and potent. I always measure with my heart when it comes to garlic, but 8 cloves is a good starting point. It adds that pungent, savory depth that balances the spice and tang beautifully.
- 1/4 cup fish sauce: Trust me on this one. If you're hesitant about fish sauce, don't be! It adds an incredible depth of umami that you just can't get otherwise. It's that secret ingredient that makes your Korean Cabbage Kimchi taste truly authentic and complex. It brings a salty, savory richness without tasting overtly "fishy" in the final product.
Making Korean Cabbage Kimchi: A Step-by-Step Guide
- Step 1: Brine Napa Cabbage:
- This is where the magic starts for our Korean Cabbage Kimchi! You're basically giving your cabbage a long, relaxing salt bath. Mix that coarse sea salt into the filtered water, then submerge your chopped cabbage. Give it a good massage to make sure every piece gets coated. This step is crucial for softening the cabbage and drawing out excess water, getting it perfectly primed to absorb all those amazing flavors later. Let it hang out for a few hours, flipping occasionally. You'll see it transform, becoming more pliable and ready for its spicy makeover.
- Step 2: Cook Rice Paste:
- This little step is a game-changer for your Korean Cabbage Kimchi! Whisk together the glutinous rice flour with a bit of filtered water in a small pot. You're going to cook it gently until it thickens into a glossy, translucent paste. This isn't just for texture, it acts as a binder for the kimchi paste, helping it cling to every single piece of cabbage. Plus, it provides a little food for the good bacteria during fermentation, which means more complex, delicious flavors down the line. Don't skip it!
- Step 3: Blend Kimchi Aromatics:
- Okay, time to get fragrant! Into your blender or food processor goes your minced garlic, grated ginger, fish sauce, and sugar. This is the aromatic backbone of your Korean Cabbage Kimchi, so don't be shy. Whiz it all up until it's a smooth, pungent mixture. The smell alone will tell you you're on the right track! This blend creates a powerful flavor base that will infuse every bite of your soon-to-be delicious fermented cabbage.
- Step 4: Create Kimchi Paste:
- Now for the fun part mixing the iconic red paste! In a large bowl, combine your gochugaru (those beautiful red chili flakes), the aromatic blend from Step 3, and your cooled rice paste from Step 2. Stir it all together until you have a thick, vibrant red paste. This is the heart of your homemade kimchi. It should smell spicy, sweet, and savory all at once. Wear gloves for this part, trust me, that gochugaru can stain and tingle!
- Step 5: Prep Fresh Vegetables:
- While your cabbage is brining and your paste is chilling, you can prep any other fresh veggies you want to add. I usually keep it simple for beginners, but things like sliced carrots, green onions, or even daikon radish are fantastic. This step is all about adding extra texture and flavor dimension. Just make sure everything is clean and ready to be coated in that amazing paste. It'll add a lovely crunch to the finished product.
- Step 6: Mix and Coat Kimchi:
- This is where the magic really happens for our easy Korean Cabbage Kimchi! Drain your brined cabbage really well, squeezing out as much water as you can. Then, in a giant bowl (or even a clean sink, honestly!), combine the cabbage with your glorious kimchi paste. Put on those gloves seriously, protect your hands! Get in there and massage that paste into every single piece of cabbage. It’s messy, it’s tactile, and it’s so satisfying to see that vibrant red coating everything. Make sure every piece is lovingly covered.
Making kimchi is such a hands-on, joyful experience. From massaging the cabbage to seeing that vibrant red paste coat every leaf, it feels so connected to the food. It's a little messy, a little spicy, and a whole lot of love. Every time I make a batch, I feel like I'm doing something ancient and wonderful in my own kitchen. It's truly a labor of love that pays off in incredible flavor.
Storing Your Homemade Fermented Cabbage
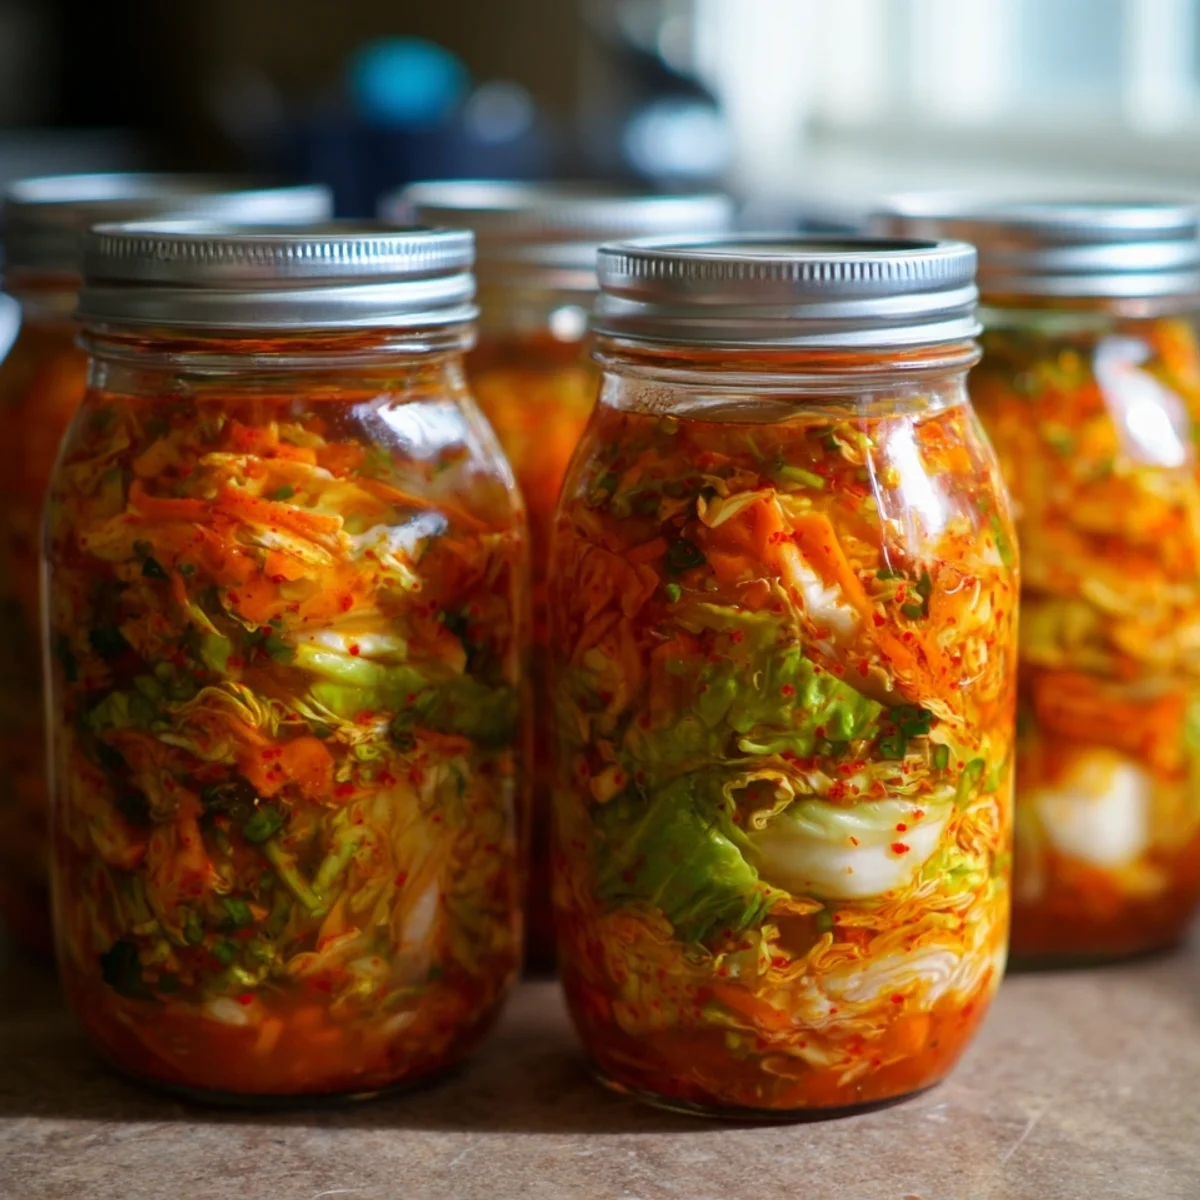
Once your kimchi has fermented to your liking, move it to the fridge! It’ll keep happily there for several months, honestly. Just make sure it’s packed tightly in airtight jars or containers. I once used a container with a loose lid, and oops, my fridge smelled like a kimchi factory for a week! Keep it submerged in its own liquid that's key for preventing mold and keeping it fresh. If it dries out, it's more prone to spoilage. You can always press it down with a fermentation weight or even a small, clean plastic bag filled with water to keep it submerged. It actually gets more sour and complex over time, which is just delicious.

Swapping Ingredients for Your Kimchi
I've played around with substitutions a bit, and while this recipe is pretty solid, here are some things I've tried. If you don't have fish sauce, you can use a good quality soy sauce or even a vegan "fish sauce" alternative for a similar umami punch, though the flavor profile will be slightly different. For the glutinous rice flour, regular all-purpose flour can work in a pinch for the paste, but the texture won't be quite as silky. If you're sensitive to spice, you can reduce the gochugaru, but don't omit it entirely it's crucial for flavor and color. I even tried adding shredded apple once for a touch of sweetness, it was... interesting, but I prefer the classic!
Serving Up Your Delicious Korean Cabbage Kimchi
Okay, so you've got your beautiful batch of Korean Cabbage Kimchi, now what? Honestly, I eat it straight out of the jar sometimes! But it truly shines as a side dish to almost any Korean meal think bulgogi, bibimbap, or a hearty stew. It's also amazing folded into fried rice, stirred into ramen for an extra kick, or even topping a grilled cheese sandwich (don't knock it 'til you try it!). I love a little bowl of fresh kimchi next to my morning eggs. The tangy, spicy crunch just brightens everything up. It’s so versatile, you’ll find yourself adding it to everything!
The Heartwarming Story Behind This Fermented Cabbage
This fermented cabbage isn't just a food, it's a way of life, a cultural cornerstone in Korea. Historically, families would gather for "Kimjang," a communal event where huge quantities of kimchi were made to last through the long winter months. It's a tradition that celebrates community, preserving food, and passing down recipes through generations. Learning to make my own, even this easy beginner version, feels like a small connection to that rich history. It’s more than just fermented cabbage, it's a taste of Korean heritage, a labor of love shared across time. Making it at home, you're tapping into something truly special.
And there you have it, my friends! Your very own, incredibly delicious homemade kimchi. It might seem like a project, but it’s so rewarding, I promise. There's nothing quite like the taste of homemade. I can't wait for you to try it and make it your own kitchen staple. What are you waiting for? Get brining! I'd love to hear about your kimchi adventures in the comments below!

FAQs About Easy Kimchi
- How long does kimchi take to ferment?
It really depends on your preference and room temperature! At room temp (around 68-72°F), it can be ready in 2-5 days. I usually taste it daily after day 2. When it's tangy enough for you, move it to the fridge to slow down fermentation. It's all about finding that perfect sour-spicy balance you love.
- How do I know if my kimchi has gone bad?
Trust your nose! If it smells really off, like spoiled rotten, or you see fuzzy mold (not just white film, which can be kahm yeast and harmless), it's best to discard it. A little white film on top is usually kahm yeast and can be scraped off, it's not harmful but can affect flavor. If in doubt, toss it out!
- Can I make kimchi without fish sauce?
Yes, you can! For a vegan version, substitute the fish sauce with an equal amount of soy sauce or a vegan "fish sauce" alternative. The flavor will be slightly different, lacking that deep, savory funk, but it will still be delicious and flavorful. It's all about personal preference and dietary needs!
- What if my kimchi isn't fermenting?
Fermentation needs warmth! If your kitchen is very cold, it might take longer. Try moving it to a slightly warmer spot, around 70°F. Also, ensure your cabbage was properly brined and your ingredients are fresh. Sometimes it just needs a bit more time and a gentle nudge in temperature to get those good bacteria going.
- Why is my kimchi too salty?
This usually happens if the cabbage wasn't rinsed enough after brining, or if too much salt was added to the paste. Next time, taste a piece of brined cabbage before rinsing it should taste pleasantly salty, not overwhelmingly so. You can try adding a bit of sugar or some fresh, un-brined cabbage to balance it out if it's already made.
Easy Korean Fermented Cabbage Kimchi for Beginners
Learn to make authentic Korean fermented cabbage kimchi. This beginner-friendly recipe guides you through simple steps for delicious, probiotic-rich homemade kimchi.
Ingredients
The Crisp Foundation
- 2 1/2 lbs Napa cabbage, cut into 2-inch pieces
- 1/2 cup coarse sea salt (for brining)
- 8 cups filtered water (for brining)
The Fiery Fermentation Paste
- 1/2 cup gochugaru (Korean chili flakes)
- 8 cloves garlic, minced (about 2 tbsp)
- 1 tbsp fresh ginger, grated
- 1/4 cup fish sauce
- 1 tbsp granulated sugar
- 1 tbsp glutinous rice flour
- 1/2 cup filtered water (for rice paste)
- 1/2 small yellow onion, roughly chopped
Fresh & Vibrant Accents
- 1 bunch green onions (scallions), cut into 2-inch pieces
- 1 medium carrot, julienned
Instructions
-
1Brine Napa CabbageCut 2 1/2 lbs Napa cabbage into 2-inch pieces. In a large bowl, combine the cabbage with 1/2 cup coarse sea salt and 8 cups filtered water. Ensure all cabbage is submerged. Let it brine for 1.5 to 2 hours, turning every 30 minutes, until softened. This is crucial for your Easy Korean Fermented Cabbage Kimchi for Beginners.
-
2Cook Rice PasteWhile the cabbage brines, whisk 1 tbsp glutinous rice flour with 1/2 cup filtered water in a small saucepan. Cook over medium heat, stirring constantly, until it thickens into a translucent paste, about 2-3 minutes. Remove from heat and let it cool completely.
-
3Blend Kimchi AromaticsIn a food processor or blender, combine 1/2 small yellow onion, 8 cloves garlic, and 1 tbsp fresh ginger. Process until a smooth paste forms. This aromatic base is key to the vibrant flavor of your Easy Korean Fermented Cabbage Kimchi for Beginners.
-
4Create Kimchi PasteIn a large bowl, combine the cooled rice paste, blended aromatics, 1/2 cup gochugaru, 1/4 cup fish sauce, and 1 tbsp granulated sugar. Mix thoroughly until a uniform, vibrant red paste forms.
-
5Prep Fresh VegetablesOnce the cabbage is brined, rinse it thoroughly under cold running water 3-4 times to remove excess salt. Squeeze gently to remove water. In a separate bowl, combine 1 bunch green onions (cut into 2-inch pieces) and 1 medium carrot (julienned).
-
6Mix and Coat KimchiAdd the rinsed Napa cabbage, green onions, and carrots to the large bowl with the kimchi paste. Wearing gloves, thoroughly mix and massage the paste into all the vegetables until every piece is evenly coated. This ensures consistent flavor for your Easy Korean Fermented Cabbage Kimchi for Beginners.
-
7Pack and FermentTightly pack the kimchi into a clean, airtight jar or container, pressing down to remove air pockets. Leave about 1-2 inches of headspace. Seal the container and let it ferment at room temperature (65-70°F) for 1-3 days, tasting daily until desired sourness is reached.
Notes
Always wear food-safe gloves when mixing kimchi to protect your hands from the chili flakes and prevent irritation.
Once fermented to your liking, transfer the kimchi to the refrigerator. It will continue to ferment slowly and can be stored for several weeks to months.
For a vegan version, substitute the fish sauce with an equal amount of soy sauce or a vegan fish sauce alternative. You can also add a grated apple or pear for natural sweetness instead of sugar.
Enjoy your homemade Easy Korean Fermented Cabbage Kimchi for Beginners as a side dish with almost any meal, stirred into fried rice, or added to stews and soups for a delicious tangy kick.
Equipment
Please check ingredients for potential allergens and consult a health professional if in doubt.
Nutrition Facts
It is important to consider this information as approximate and not to use it as definitive health advice.
Comments
Leave a Comment